Restorer of the Year: Converting a ‘rusty’ Triumph Herald and turning a MGB GT into a showroom beauty
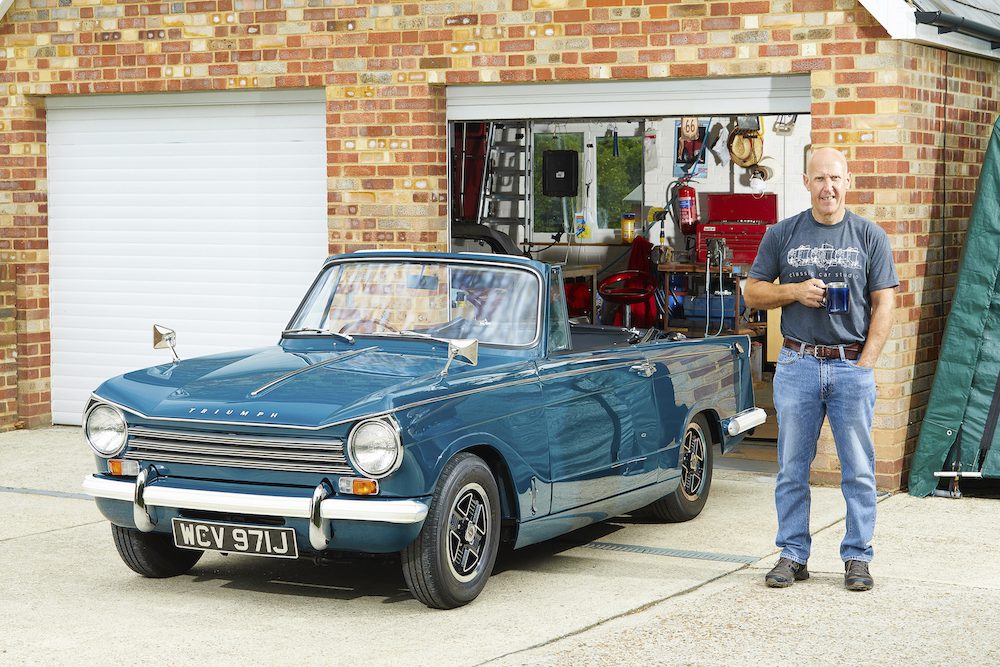
From the pages of Practical Classics Magazine, we meet Mick Clark, who restored a rusty Triumph Herald into a showroom beauty, and the Clark family, who have bought and restored a fleet of classic cars.
As a specialist classic car insurance broker, we love seeing old cars being restored to their former glory, which is why we’ve linked up with Practical Classics to bring you two fantastic stories each month for you to digest and take as inspiration for your own classic rebuilds.
Converting a Triumph Herald from ‘rust bucket’ to a masterpiece
Words by Nigel Clark and Pictures by Matt Howell
Mick Clark may be a Ford man through and through – he’s owned countless blue oval badged motors and worked for the global giant – but a few years ago he decided to restore a Triumph. In his words: “I was looking for a cheap classic my student son could enjoy during the holidays, and that I could improve while he was away at university.”
He found the car locally on the Isle of Sheppey ten years ago; the fact it was a convertible was simply a bonus. He thought it wasn’t too bad and would serve through the coming summer before needing work. In a moment of revelation familiar to many restorers, Mick found it to be “a lot more rotten than I’d hoped”. Never a man to do half a job, the decision was quickly taken that the body would need to be removed from the chassis to do a “proper job.”
It took another five years for Mick to gradually start on the restoration in 2017, repairing the chassis after stripping the car down. Front outriggers were replaced along with several welded repairs to other areas of the chassis, notably around the diff mounting points. Care was taken never to cut away too much metal at once, hoping the chassis would retain its original shape and allow the body to fit back as accurately as it had before.
Once the chassis was solid again, Mick cleaned, refurbished and painted the running gear then assembled the rolling chassis. Those unusual alloy wheels came with the car and are period Avon Safety rims, which supposedly allow tyres to run flat without peeling off. Mick painted and polished them himself following an eye-watering quote from a wheel refurbisher.
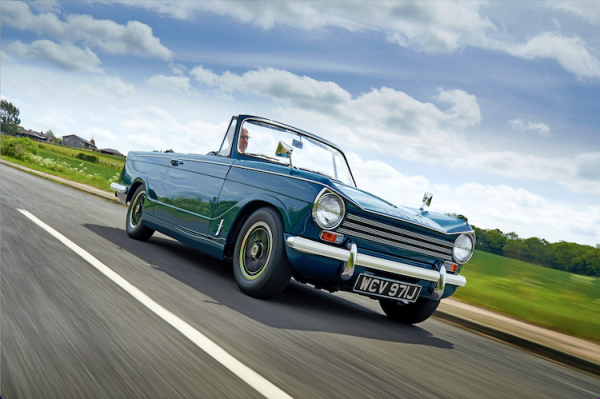
Retirement closely followed by the global pandemic suddenly gave Mick more time to spend on restoration and from 2019, the pace picked up, with the focus now firmly on the rusty body sections. On the front half of the tub, both footwells needed extensive repairs, with more new metal being grafted into the heater well, windscreen frame and lower bulkhead.
The doors had been re-skinned poorly at some point in the past, and the passenger door had a deep dent disguised with filler. He repaired the doors and taught himself to metal shrink, removing that troublesome dent. He also shaped and invisibly let in a repair section in the curved front valance, just inboard of the bumper overrider.
The rear tub also needed plenty of welding, for which it stood on end outdoors during a period of fine weather, giving great access to the underside. New wheel arches went in, and Mick made them welded in about six sections for the boot floor including new side drop-off plates. When the body repairs were complete the individual sections were all primed. Mick chose to spray with two-pack epoxy primer because of past poor experience with two-pack filler primer.
He reasons: “filler primer is hygroscopic and can trap moisture under the topcoat, leading to micro-blistering. Epoxy primer has excellent adhesion, plus it’s supposedly waterproof and resistant to stone chips.”
Once primed, in his typically thorough fashion, Mick assembled the body onto the chassis for final flatting then removed it again before applying topcoat, “to make sure everything was the correct shape.” This, coupled with the care he took with welded repairs, meant the body needed only minimal application of filler and now it’s finished, it looks completely straight, undoubtedly better than when it left the Canley assembly track more than 50 years ago. Mick firmly believes in thorough preparation, saying “no amount of paint can ever hide poor preparation.”
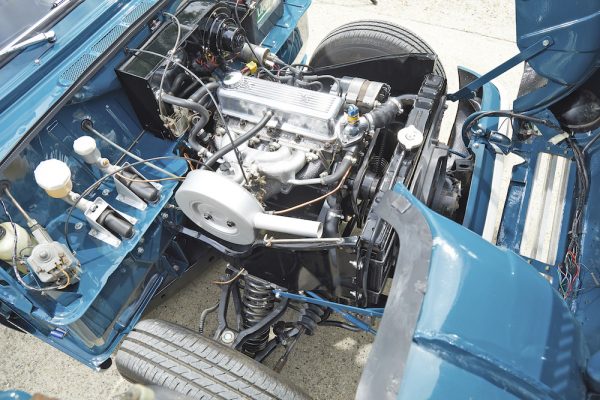
Painting was carried out partly in a temporary garage but for final finishing coats, he constructed a spray booth from plastic sheeting inside his garage. He chose to use two-pack colour in the car’s original shade of Valencia Blue, followed by a two-pack clear coat. After applying the colour, it was flatted back to matt before spraying the clear coat.
Mick says “even two-pack colours can fade in UV. The clear coat should give better fade resistance and shine.” The deep ‘just waxed’ gloss of the bodywork is remarkable, a testament to the skill with which Mick applied the many layers of paint and clear coat.
The freshly painted body was carefully assembled onto the chassis but because of the Herald’s separate chassis and bolt-together body sections, Mick needed to spend two whole days adjusting the fit panel.
He finally got all the gaps correct and the Herald looks remarkably straight with the neatest of shut lines. It’s no exaggeration to say it’s better now than when it was new. Mechanically, the car didn’t appear to need in-depth restoration, so after cleaning and painting, the gearbox and differential were refitted.
The cylinder head was removed, overhauled and refitted, the ancillaries were refurbished, and all the electrics wired up. Subsequently the gearbox turned out to need overhauling and the cylinder head gasket had a niggling leak from the oil feed drilling that supplies the rocker shaft, a very common Triumph problem.
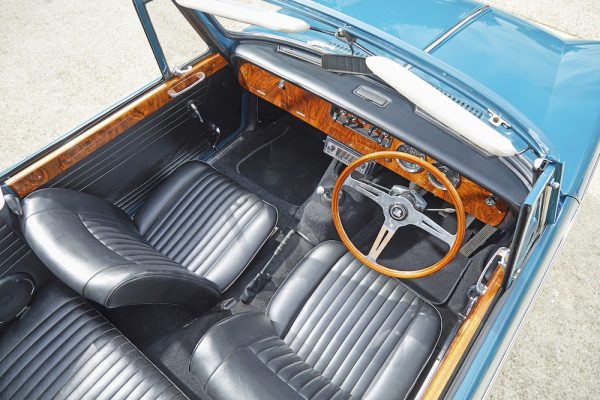
Moving to the interior, it was time for Mick to master another new skill. He looked at the flaking lacquer and veneer on the wooden dash and then thought: “how hard can it be?” That phrase often prefaces a fatal error, but as we know, Mick is happy to take time learning new skills. After consulting a restorer friend, he sanded off the old veneer and glued on new, using a sheet of ¾ inch plywood and multiple G-clamps to apply pressure while the glue set.
The most nerve-wracking moment was cutting the veneer around the glove box lid and the instrument holes. This was achieved with a steady hand and the sharpest of knife blades, with a new blade for each successive hole. There was conflicting advice on what to finish to apply. Mick used the same two-pack clear coat as for the bodywork, reasoning that it’s water and UV resistant so should be ideal.
He applied five coats, flatted back, applied another five coats then polished. The results speak for themselves, and the door cappings received the same treatment.
New carpets and rear quarter trim panels were fitted and after a good clean up, the original rear seat was refitted. The front seats are originally from a Vitesse; Mick found these on eBay not long after acquiring the car as the supplied seats didn’t look to be a matching pair. Though the Vitesse seats are more generously upholstered than the Herald items, once on the road they weren’t comfortable.
Naturally, Mick couldn’t ignore even a minor niggle, so the seats were removed and stripped, revealing rubber webbing that had perished and broken. The original Herald seats had good webbing, so he rebuilt a decent pair of Vitesse seats using the best parts from each pair. To top it off, he fitted a new hood, another self-taught technique to add to his growing list.
Back on the road after four years, the first trip was to the MOT test station in April 2021. Unsurprisingly, the Herald passed for the first time.
Now the car is finished, Mick and his wife are often out in it, either at cricket or picnicking at National Trust properties, where the little Triumph blends well with the stately backgrounds.
Mick’s restoration thoroughness and skills – old and newly acquired – are remarkable. Everything you see on his Herald is his work alone, including the concours standard paint finish. We can only salute his achievement.
Read the full version of how Mick managed to restore his Triumph Herald on the Practical Classics page.
The MGB GT that became a showroom Scottish superstar
Words and pictures by James Walshe
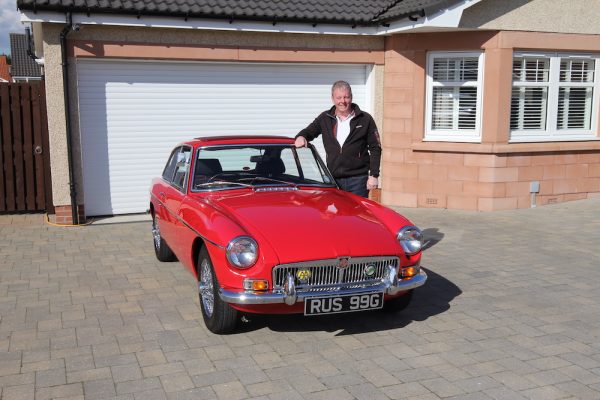
When Ian Reader came across this stunning MGB GT, he got the urge to restore it to its former glory, as he explains.
“Everything I’ve done to my MGB GT is down to the decisions I made on the day I left school in Lurgan, Northern Ireland. One morning in 1978, angry that my father wouldn’t let me join the army, I threw my school bag over a hedge and spent the rest of the day knocking on the doors of all the local businesses in my hometown until one of them gave me a job.
“Within a short time, I’d been given a job as apprentice mechanic at the local British Leyland dealer, Howard Abraham Motors. It was certainly an interesting time to be at British Leyland and, later, Austin Rover. One day, we were taken to Solihull and shown the SD1 production line. I remember pointing up inside the rear arch and asking our guide how we were supposed to get into the tight gap around the damper and suggested it would take an unusually shaped spanner to do the job!
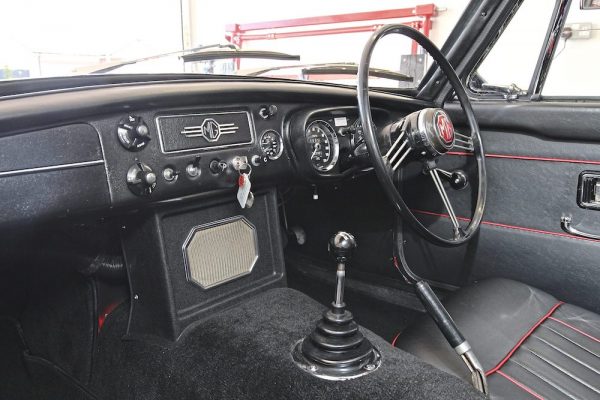
“Back at the dealership, I remember replacing a lot of Rover 2300/2600 head gaskets, while Allegros and Itals would turn up daily with juddering clutches due to oil leaks. They were a breeze to fix, luckily. Dolomites were a favourite. They were mechanically fantastic and so easy to work on, but for as long as I could remember, I’d had my eye on the MGB and in recent years, having moved to Kirkcaldy in Scotland, I finally got the chance to buy my own.
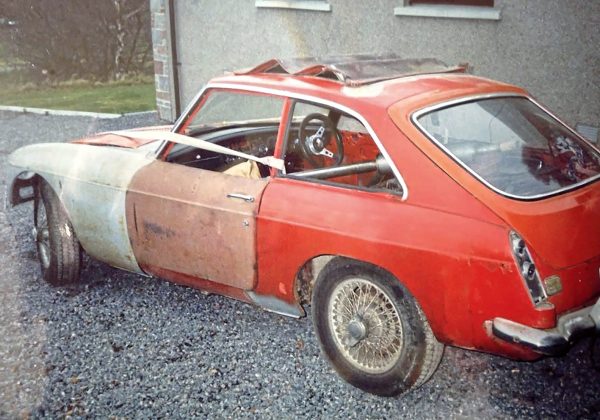
“Despite previous attempts at restoration, my tartan red MGB GT had become scruffy and required a fair bit of work to recommission it. I was thrilled with the sheer amount of history it came with and knew it would all be worthwhile. Flicking through the paperwork, I discovered a RUS 99G car had rolled off the Abingdon line on October 8, 1968 and within a few days made its way to a dealership in Glasgow called H Prosser & Sons. Registered on October 24 of that year, it had been fitted with the optional heater, wire wheels and SP radial tyres and had a succession of owners until around fifteen years ago, when it fell into the hands of a chap called Mike Malone.
“The car had become tatty so he began a full restoration, taking care of all the major welding, but Mike sadly died before completion. The car was sold as a project to an enthusiast in Edinburgh, who made some progress and added modifications such as seats from a ’72 car to make it comfier for long journeys. The car remained unfinished, however, and by the time I bought it, the poor little MG required urgent attention. I was confident though, with my experience, that I could get stuck straight in and turn the car into something special again!
“First job was to remove all the mould and muck. I then set about going through every aspect of the bodywork and found mostly good news. Mike’s previous efforts at quality welding helped, so I cleaned and treated every part of the metalwork. The tops of the wings needed attention and there was a little welding underneath to do, while the paintwork had suffered the ravages of time. Once stripped down, I sent the car away to my friend David, who straight away went around it with a felt tip pen to identify all the areas he said needed doing. There was a lot more than just the blemishes I could see – but then guys like him have a real eye for detail, luckily!
“Reassembly took place soon after, which was when I spent days fettling the chrome trim around the windows with items bought new, but none of it fitted properly. I had to use my Dremel to reshape it. The front bumper was twisted up, so I was able to straighten that out.
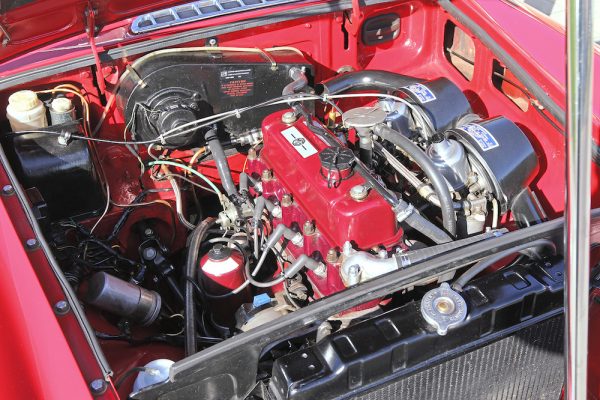
Under the bonnet, while the rear core plug hadn’t been fitted properly and kept blowing out, the engine otherwise ran nicely enough.
“The cylinder head is polished and ported with bigger valves and tougher springs. It sounded a bit ‘chattery’ so I fitted an upgraded rocker shaft and a sports exhaust. The car breathes so much better now. I finished it off by repainting the engine in the period maroon colour and freshened up the entire engine bay. You can’t tell the difference by looking at the engine, but these modifications certainly give the car a sportier feel.
“I have the original cylinder head stored away and wrapped in oily rags just in case I ever wanted to take it back to factory spec. Elsewhere, I replaced the brake light switch as it was leaking fluid down the side of the inner arch, replaced all the brakes and found one of the half shaft bearings was coming loose so I stripped that out.
“My wife Gillian and I have since driven to Ireland and to the far north of Shetland but otherwise, since leaving Abingdon in 1968, the car has only gone south across the Forth Bridge once in its life! A few years ago, the daughter of former owner Mike Malone spotted the car at the Glamis Scottish Transport Extravaganza and she was in tears. Seeing her reaction to the car brought a lump to my throat! It was the first time she’d seen it looking like this. The car won an award that day, too. The combination of those two things was the real highlight of owning this beautiful car.”
Read the full version of how Ian managed to restore this beautiful MGB GT on the Practical Classics page.

