How to register NEFT details in LIC online

I was regularly getting many queries about How to register NEFT details in LIC online? Since Life Insurance Corporation of India now settles all its claims directly into the bank account of the policyholder, NEFT details must be registered in the policy, otherwise, payment will not be processed.
Life Insurance Corporation of India is regularly adding more services in its online portal which are more useful and now very important for the policyholders as they are unable to move freely in this pandemic situation. From 01/07/2020 Life Insurance Corporation of India has given the facility on its portal to register NEFT details in LIC online. Now you do not have to go to the LIC office to register the NEFT details. Now within the safety of your home, you can register the NEFT details in LIC online.
Before you start the process to register the NEFT details in LIC online you must have the following things with you in order to complete the process without any problem. First, you must be registered on the LIC portal in order to register the NEFT details. If you are not registered yet please read एलआईसी ई-सेवाओं के लिए रजिस्ट्रेशन कैसे करें? (How to register for LIC e-Services). Assuming that you are already registered on the LIC e-Services portal we will proceed with the next part. You must have the following things in order to complete the process.
Scanned image of your CTS cheque (Please note that only CTS cheque is accepted to register NEFT details in LIC online)
Scanned image of your PAN card.
So lets see the process of How to register NEFT details in LIC online
Step 1: Log in to LIC portal
Login to your LIC e-Services account using your LIC customer portal ID and Password, you can go the LIC customer portal using this link also. As soon as you log into the portal you are going to see a flash message from “LIC Online NEFT Registration facility is now available to Customer Portal users. To avail the facility, click here” Please see the screenshot below:
If in any case, you do not get the above screen after you log in, just click on My Apps tab given on the menu bar on your customer portal page alongside the Home icon. You will see the home screen as given below. That’s it, just click the Service Request(s) button to choose and go to the NEFT capture page.
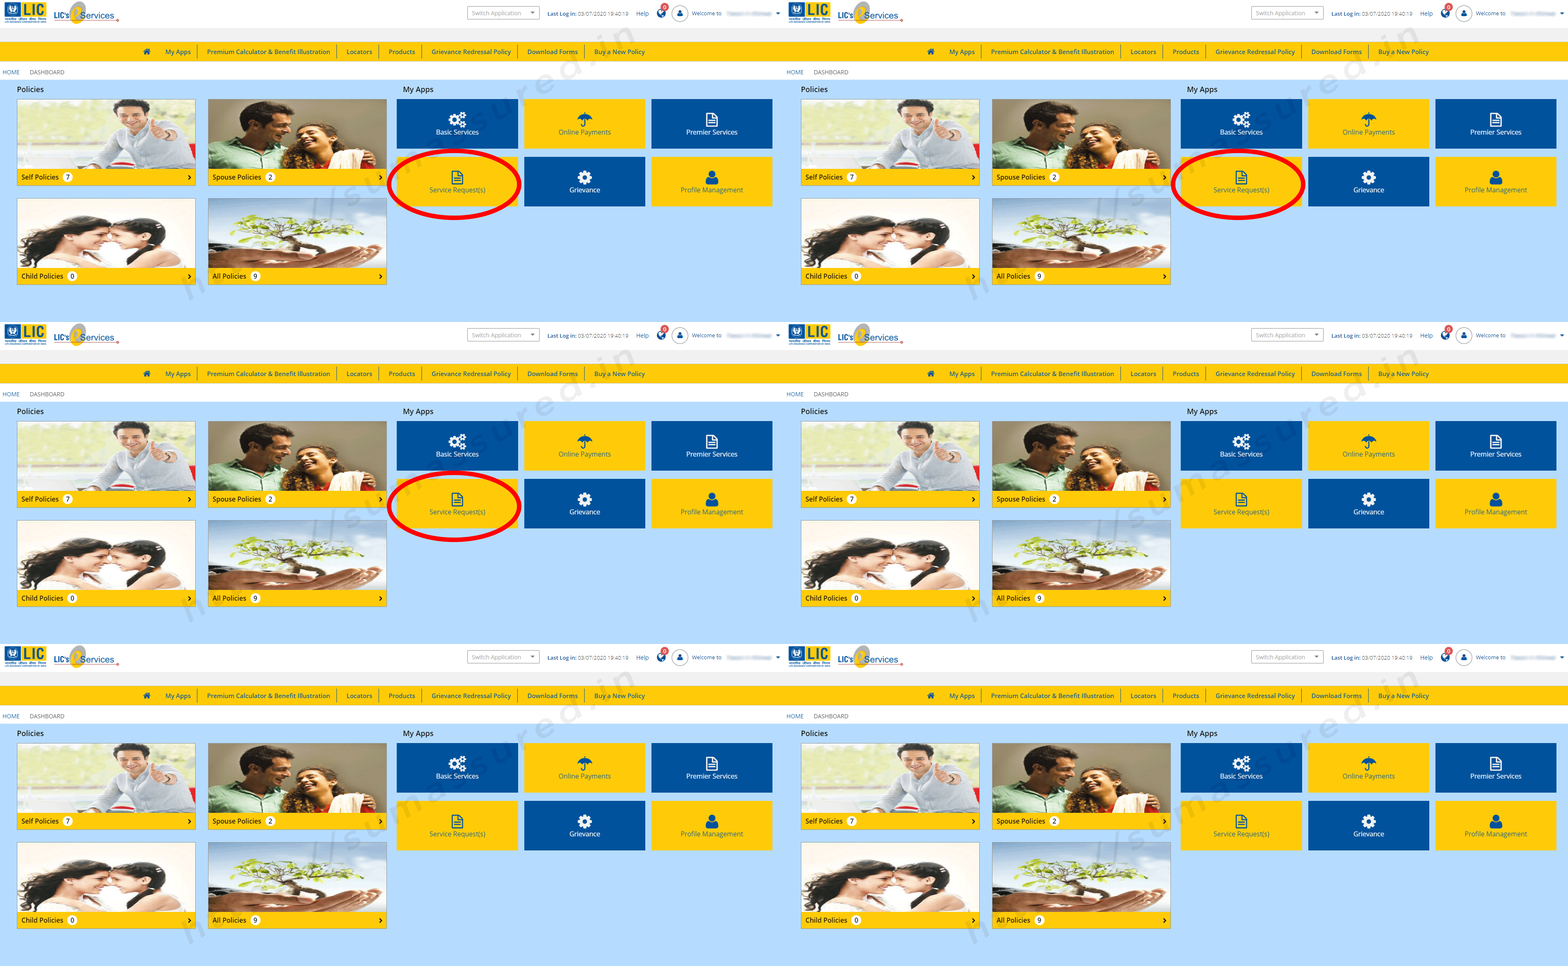 Click on Service Request(s) button to Register a service request for NEFT
Step 2: Select Service request to Register NEFT online
After you click on the Service Request(s) button, you will be directed to the Sevice Request page to register a new request in your LIC policy. To register NEFT details in LIC online, click on the drop-down Select Service Request. You will see 6 option to choose from those are:
Premium Service Registration
Loan
Address Change
NEFT Registration
Online ULIP fund switch
PAN data registration
So, today we are looking for NEFT registration only, Don’t worry, we will discuss all the services requests in detail in my nest posts. Anyways, just click on NEFT Registration from the drop-down list.
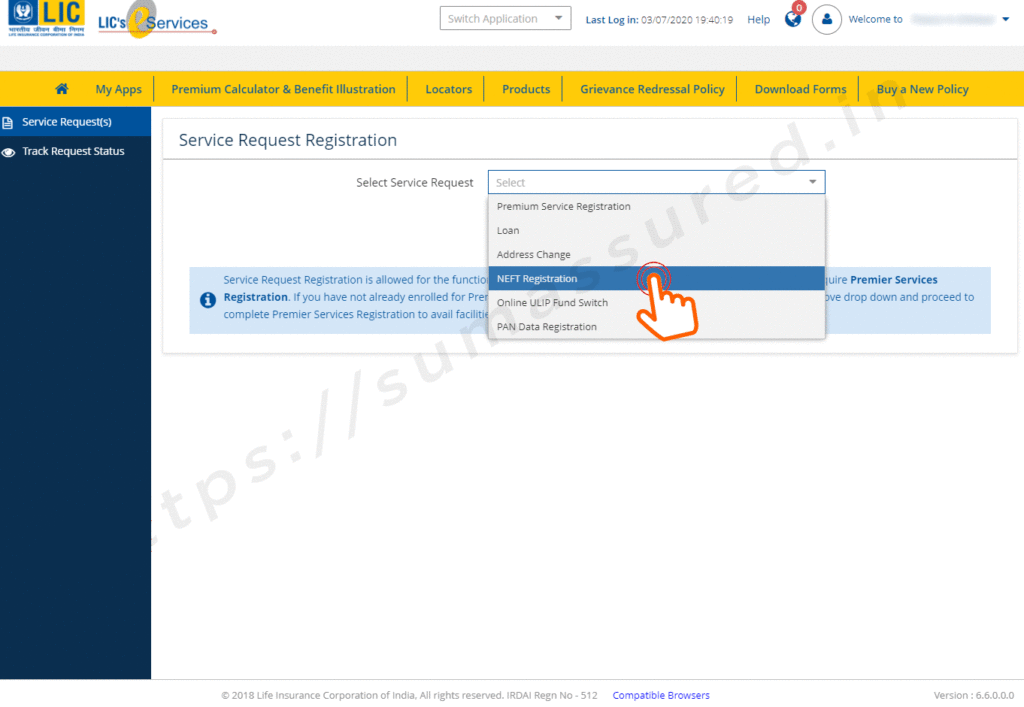
Select Service request type as NEFT registration and proceed
When you select the NEFT Registration from the drop down menu, a new information will appear on your page. The read it carefully, I have given it below for your ready reference
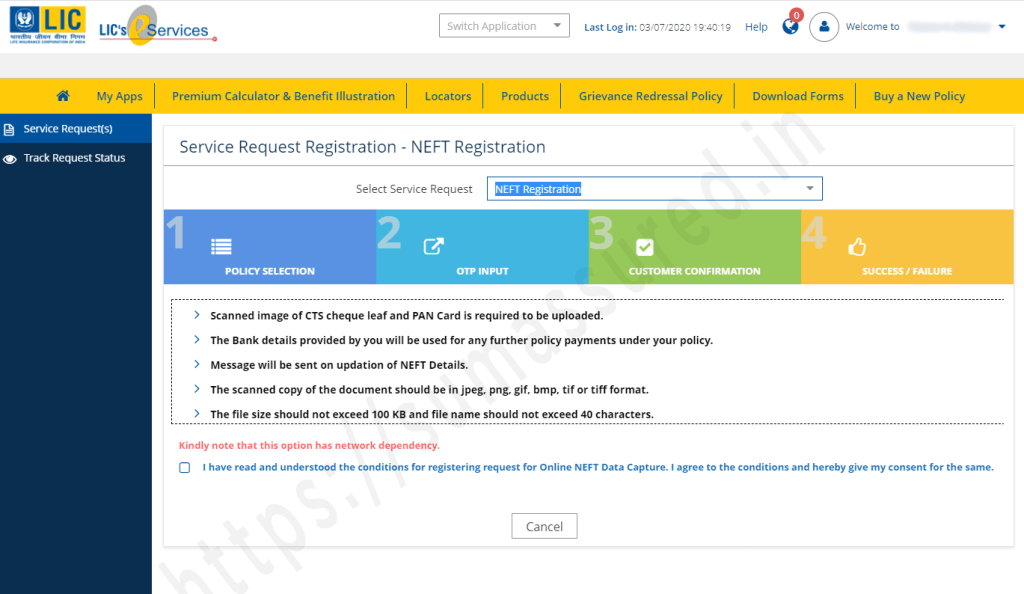
Read the conditions carefully and accept them and proceed.
Step 3: Policy Selection for NEFT Registration
Please check the condition acceptance box thereafter the Proceed button will appear on the screen. Just click on the Proceed Button to go to the next step ie selection of the policy. In the next screen you will see all the policies which do not have the NEFT details registered in them. Just select the policy in which you want to update the NEFT request. Currently there is no option to choose multiple policy to register the NEFT details you have to repeat the whole process for every single policy in which you want to register the NEFT details online. As soon as you select the policy displayed on the screen, a Proceed button will appear on the screen. Click on the Proceed button for OTP validation.
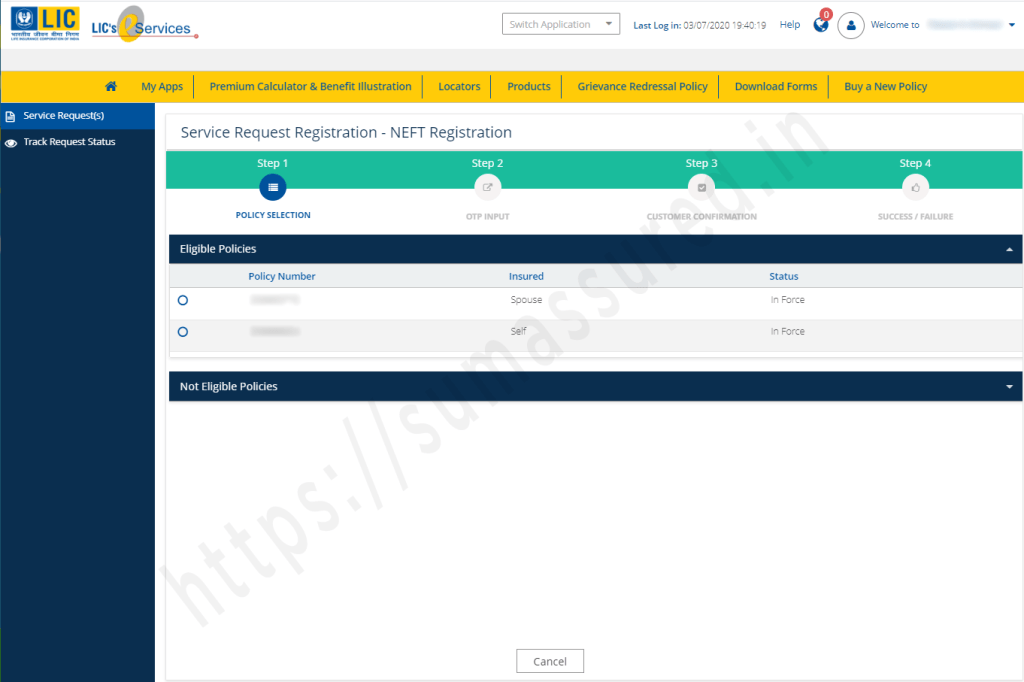
Select the policy in which you want to register the NEFT details
Step 4: OTP validation for varification
Just click on the Proceed and a OTP will be triggered on your mobile number registered in your LIC portal.
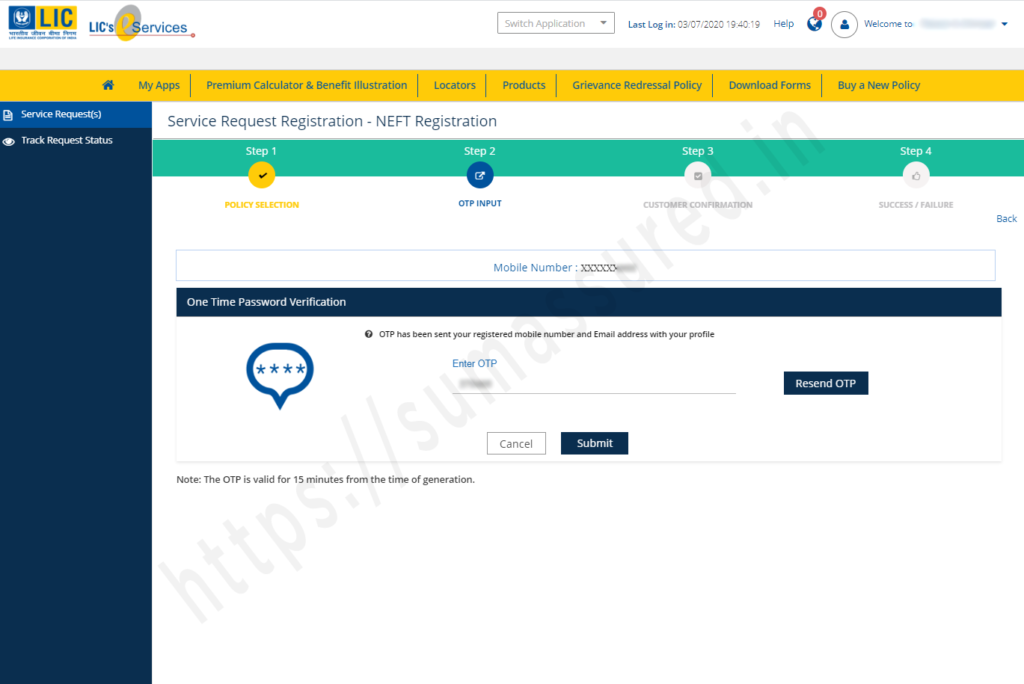
Enter the OTP received on your mobile and click submit.
You will receive a 6 digit OTP on your registered mobile number. Just enter the OTP on the designated place and Click on submit. If in any case you do not receive OTP, press Resend OTP button to resend the OTP on your mobile. Please note that every time you will receive the different OTP, so always enter the newest OTP to proceed further.
Step 5: Fill your bank details
After the successful validation, you will be redirected to the page where you have to give the bank details that you have to register in your policy. Your policy number and your name as per your policy record along with your registered mobile number and email ID will be visible on the screen.
You have to fill following details here in this page
Your bank IFSC code. Its an 11 digit code is specific to every bank branch. Please note that the first four letters of IFS code are alphabets assigned to every bank and unique for every bank. 5th letter is 0 (Zero) by default. The next 6 letters can be numbers or alphabets. As soon as you enter the IFSC code of your bank branch, bank and branch details will be displayed on the screen, you do not have to manually fill those details.
Select your account type from the drop-down list
Enter your bank account number
reconfirm the bank account number
enter your PAN number in the designated place
After entering all the details hit Save button to save the data. If you want to change the data and enter again, just click on Reset button and every details filled by you will be removed, enter correct details again and click on Save button.
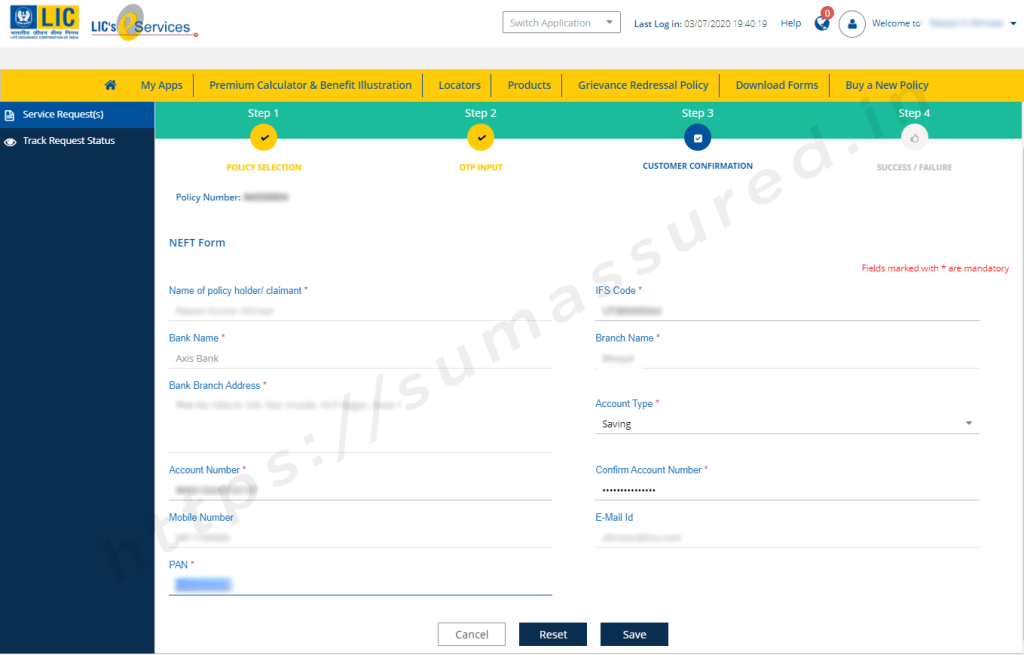
Fill you bank details
Step 6: Generate the NEFT form
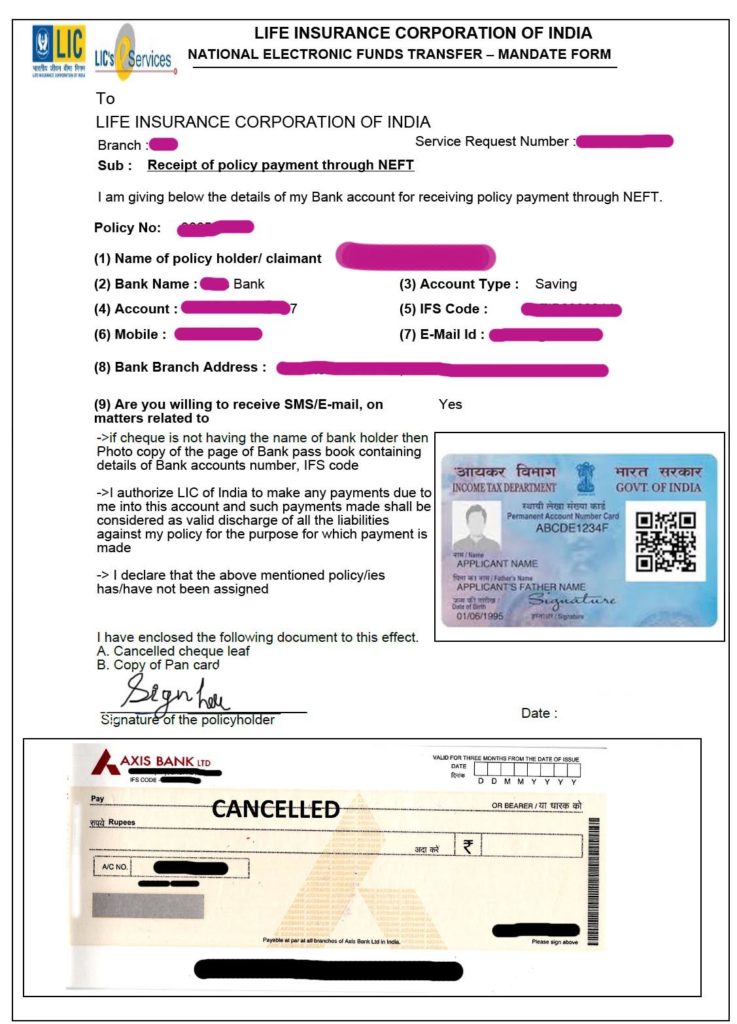
If all the data is correct then a Success message will be displayed on your screen as given below. Now, just click OK to proceed further. On the next screen, you will see a new button at the bottom of the page which is Generate NEFT Form. Click on the button to generate the NEFT form. The Form contains all the details related to you ie your policy number, name, mobile number, your email ID, and the bank details entered by you in the previous step. This form will also have two boxes exclusively for your Cheque image and PAN card image.
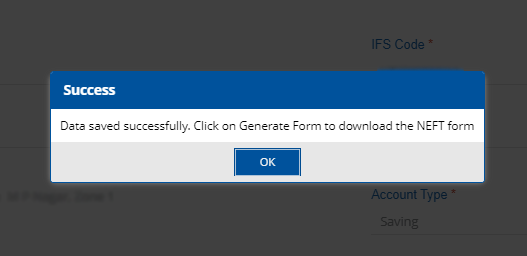
Success message after error-free data entry.
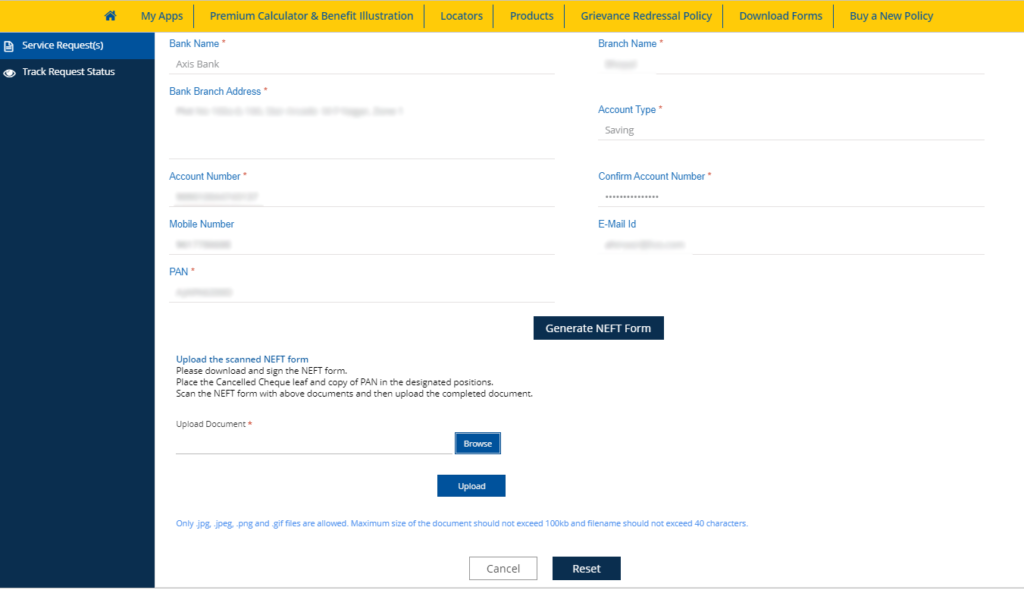
Click on Generate NEFT Form to download the form.
Take the print out of the form, sign and put date on it. Now either place your PAN card and CTS cheque on designated place and scan the form or scan the form and place the already scanned images of CTS cheque and PAN data on the designated places. See the complete form below (For security and privacy reasons, sensitive information is hidden)
Step 7: Upload NEFT form to register NEFT details
Scan the form and save it in one of these formats ie.JPG, .PNG, .GIF file format and upload it on the LIC portal. To upload the scanned NEFT form, click on the Browse button on the page (see the screenshot below) select the scanned image, and hit the Upload button to upload the document. Please keep in mind that file larger than 100kb is not allowed, so keep it small in size below 100kb size.

Upload the NEFT form.
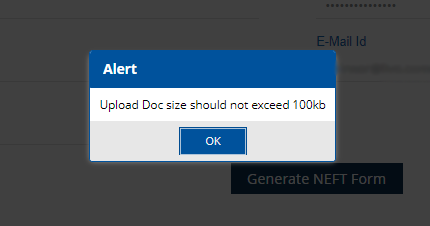
Large file Alert
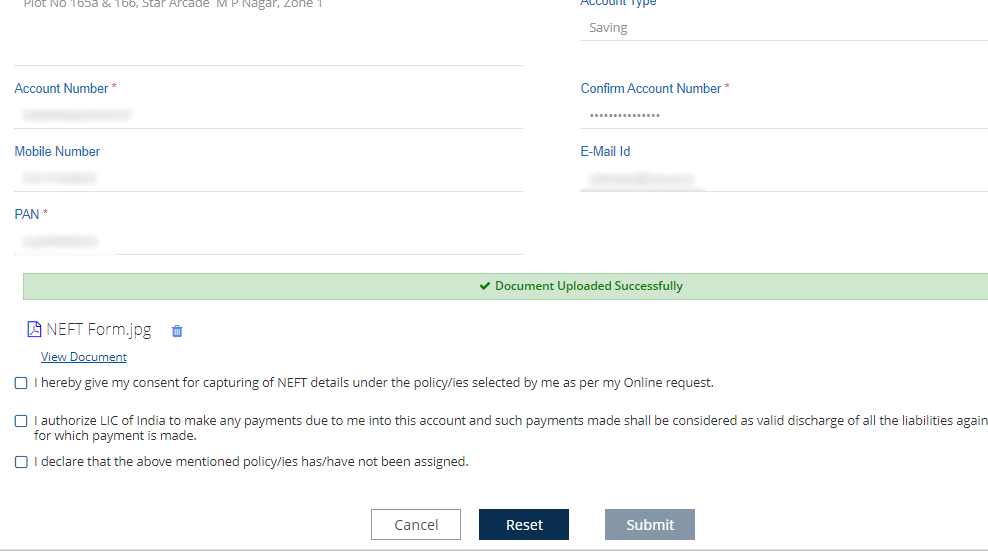
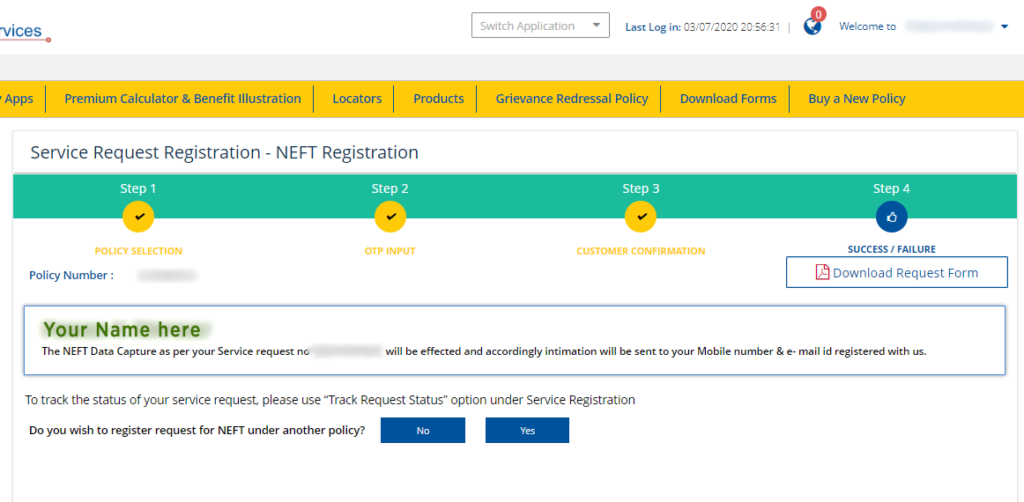
After the successful upload a message “Document Uploaded Successfully”. Now read the statement given below the message, check mark them to accept them and click on Submit button. Now your Process is complete to register your NEFT in LIC online.
A email related to this will be sent on your registered email ID regarding the successful updation of your NEFT details in your policy. Repeat the process for all of your policy to register the NEFT details in LIC online.


