Diono LiteClik 30 R SafePlus Rear Facing Only Car Seat Review
Diono LiteClik 30 R
Diono is a name most of us know by now, it’s been around for quite some time. Both my college student and my high schooler rode in Diono’s Radian multimode car seat when they were young — we even traveled with our Radians! I know it seems a little unusual to start a review by talking about a different car seat but…. while Diono has made the narrow Radian multimode car seat (and its wider cousins in later years) for all of that time, they haven’t entered the rear facing only car seat chat.
Until now. Meet the LiteClik 30. It’s a budget-friendly seat with a lot of small touches that make it really easy to use properly. I feel like this is an important spoiler to share early: we’re big fans of this seat!
CSFTL Quick Stats
Height range: up to 30 inches tallWeight range: 4-30 poundsExpiration: 8 yearsReplace after crash:
Measurements
Width at widest point (carrier handle): 17 inchesLowest harness slot with insert: 4 inchesLowest harness slot without insert: 5.5 inchesHighest harness slot without insert: 10 inches2 crotch buckle positions: 3 and 4.5 inches from the back of the seat shellCarrier weight: 8.6 poundsBase weight: 6.8 pounds
Features
Anti-rebound bar80/20 overhang rules
Assembly
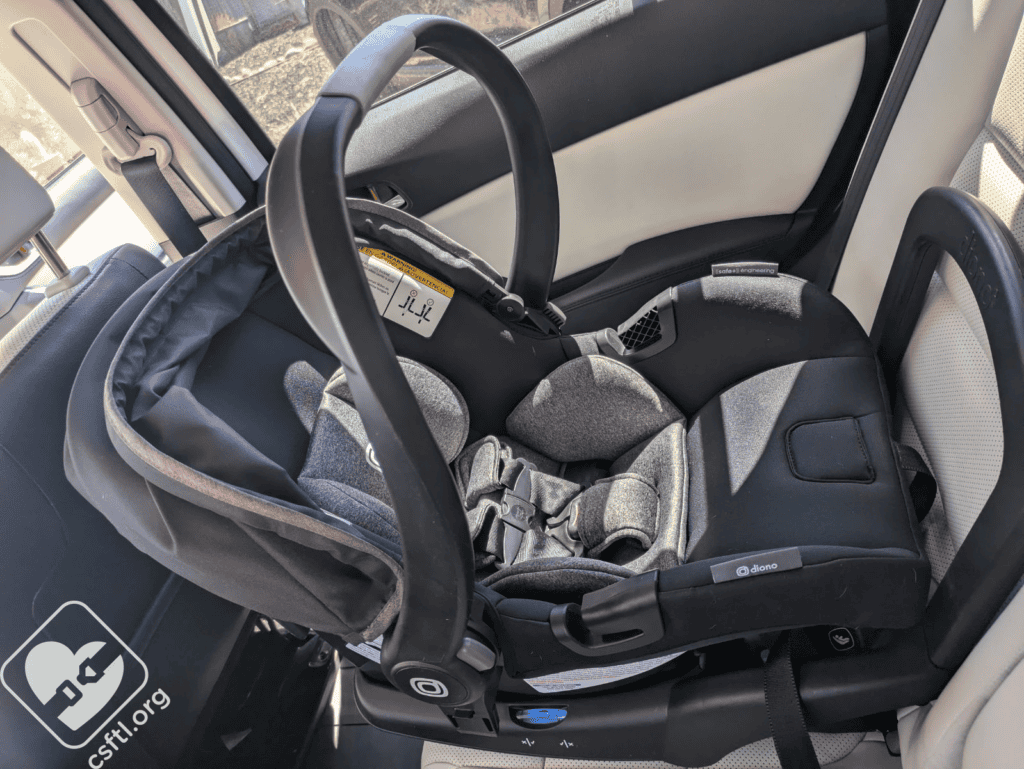
Diono LiteClik assembling the anti rebound bar
The anti-rebound bar arrives separately from the seat’s base. The first step in assembling it? Finding the bar in the packaging — mine was hiding. But once I found it, attaching it to the base was quite easy, just line the posts up with the slots in the base and press down.
The manual includes a note: “you will need two people to remove the anti-rebound bar.” Naturally I’ll try this alone for you, please stay tuned. The manufacturer let us know that seats made after our mid-2024 seat will include a mechanism that makes removing the bar fairly easy so that’s a nice change.
Canopy Requirement
If you’re leaving the canopy on, make sure the canopy is attached before securing the child in the carrier. The manual includes 2 full pages of canopy attach/detach instructions, but I’m really not quite sure why.
80/20 Overhang for Installations with the Base
My biggest complaint about the seat sounds more complicated than it is. The seat includes some pretty specific and yet vague guidance around how much of the base can hang over the vehicle seat. 80% of the base must be on the vehicle seat. This requirement can be challenging for some caregivers so it’s probably good that Diono included such detailed instructions though I fear they are also confusing. Here are the exact instructions, which seem to involve math:
Estimate the halfway point of the car seat baseThen halve the outer half (the half furthest from the seat bight) to mark the spot that would be about 75%Add a bit more to the footprint that is supported by the cushion. This will be about 80% and that would be meeting the 80/20 overhang guidance.
If results are unclear using the estimating method, use a tape measure and do the math.
Note: no formula for this math is provided beyond what I listed above.
Other manufacturers indicate this spot with a label or something embossed on the seat itself, we’d love to see Diono add one to the LiteClik’s base instead of requiring math.
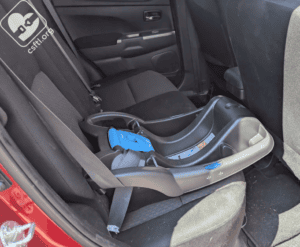
Handle Positions
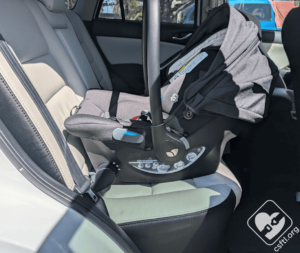
Diono LiteClik 30 installed without the base
The manual requires that the handle be in the anti-rebound position (closest to the child’s feet) when the carrier is installed without the base.
When using the carrier with the base, the handle must be in positions 2 or 3, so the middle two options. That makes handle position 1 a sad, sad panda since it’s never used while the seat is in the vehicle.
Recline Angle
The base has an easy-to-read recline angle indicator. If the bubble is between the check marks on the side of the indicator when the seat is installed, the recline angle is correct. The base includes a recline foot with five different recline positions. If it’s needed to adjust the recline angle further, just press the tab at the bottom of the recline foot to extend it. Press that same tab again to reduce the recline angle.
Installation: Lower Anchors
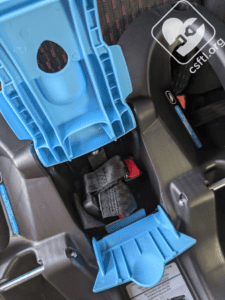
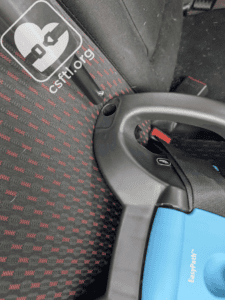
Diono LiteClik lockoff open, lower anchor storage
Set the base on the vehicle seat with the blue lockoff closer to the vehicle seat back. Open the lockoff to expose a handy little cubby where the lower anchor connectors are stored. Thread the lower anchor webbing through the belt path. The manual shows the webbing both going through the lockoff (page 43) and over it (page 44) but we’ve confirmed with the manufacturer that it goes under the lockoff. We’re confident that future versions of the manual will include clearer images of this setup.
Diono LiteClik lockoff open, lower anchor storage
The manual also issues a warning that I’ve never seen: to only have ONE lower anchor connector per vehicle anchor. Note: I will absolutely try to get two of them onto one of the anchors in my vehicle to see if that’s even possible.
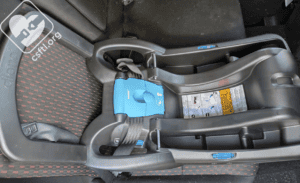
Diono LiteClik lower anchor webbing
Connect the lower anchor connectors to the lower anchors in the vehicle, then pull the tail end of the webbing straight up through the belt path to remove slack. Push down on the base while you are pulling up. I do want to note that the loop of webbing that attaches the lower anchors to the base sort of got in the way but I was able to move it out of the way before finishing the install.
Once you’re finished, check your work by giving the base a firm handshake with your non-dominant hand. If the base moves less than an inch at the belt path, you’re ready to ride.
Installation: Vehicle Seat Belt
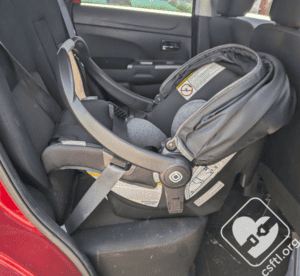
Diono LiteClik installed with the vehicle seat belt
The LiteClik’s base includes a very easy-to-use vehicle seat lockoff. To install the base with the vehicle seat belt, set the base on the vehicle seat with the blue lockoff closer to the vehicle seat back. Open the lockoff and thread the vehicle seat belt through the belt path. Pull on the shoulder portion of the vehicle seat belt to remove the slack while pressing down on the base. Close the lockoff, then check for movement at the belt path. If the base moves less than an inch at the belt path, the seat is ready to go.
In my day, I’ve seen and used many a lockoff. I have to say that the LiteClik’s lockoff is about the easiest I’ve encountered. I can see myself suggesting this seat to caregivers who seek a simple installation.
Installation: Without the Base
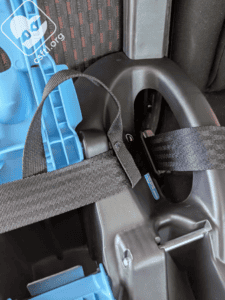
Diono LiteClik 30 installed without the base
One of my favorite things about the LiteClik is the belt guides on the carrier. They’re so easy to identify and use. That sounds like a small thing but considering how hard you have to work to unearth them on some seats, the LiteClik comes out way ahead here. Installing the carrier without the base was quite easy and devoid of fussing. This is always a good thing.
To install the carrier without the base, set the carrier on the vehicle seat with the harness facing the rear of the vehicle. Route the lap portion of the vehicle seat belt through the belt guides on the carrier, then pull on the shoulder portion of the belt to remove slack. Once the seat is secure, pull the seat belt all the way out to switch the retractor into locked mode, then feed the shoulder portion of the belt back into the vehicle until the carrier is secure. Check your work by giving the carrier a firm handshake at the belt path.
Fit to Child
Preemie Doll with Inserts
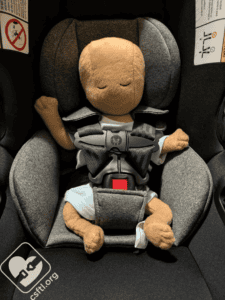
Diono LiteClik preemie doll with inserts
The manual does not include any limits on when to use or not use the infant inserts. We appreciate that kind of freedom — it gives more options for every kiddo, no matter how large or small. Our 4 pound Huggable Images preemie doll was happy to model the LiteClik. With the inserts in place, it’s a great fit for this small passenger. While we always encourage caregivers to check the fit before heading out, we feel pretty confident that the tiniest of passengers will fit well in this seat.
Preemie Doll without Inserts
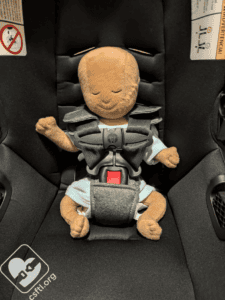
Diono LiteClik preemie doll without inserts
Since the manual does not include any limits on when to use or not use the inserts, we removed them to see how our preemie fit. The results were not as great but as always we urge caregivers to test the fit before driving a preemie home in any car seat.
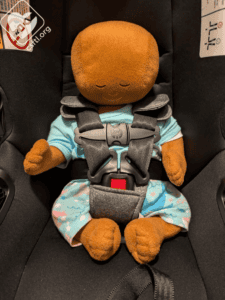
Newborn Doll with Inserts
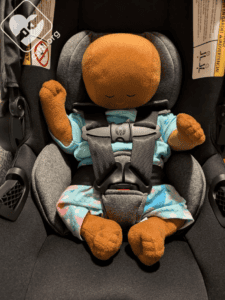
Diono LiteClik newborn doll with inserts
Our Huggable Images newborn doll weighs 7 pounds and is 17 inches long. The harness fits our doll well with the inserts in place but I wonder if our doll might be more comfortable without those inserts in place.
Newborn Doll without Inserts
Diono LiteClik newborn doll without inserts
…so I tried the fit without the inserts. Though both harness fits are good, this seems like a better fit for our doll.
Important Information: Where to Find

Diono LiteClik date of manufacture label
Date of manufacture label: the LiteClik expires 8 years after the date of manufacture. The label is located on the bottom of the base and the bottom of the carrier.

Diono LiteClik FAA approval
FAA approval: the LiteClik can be used on airplanes without the base only. The approval label is the red lettering in the large label on the outside of the carrier.

Diono LiteClik itty bitty manual
Manual storage: the manual is absurdly small and stores underneath the cover on the carrier, above the child’s left shoulder.
Overall Thoughts
I’m struggling to find any real drawbacks to the LiteClik. In a world that’s filled with overly complex rear facing only car seats, the LiteClik adds something refreshing — an easy-to-use seat that’s sold at a budget-friendly price.