Graco TriRide Multimode Car Seat Review
(Last Updated On: June 8, 2022)
Graco TriRide forward facing 3 year old doll
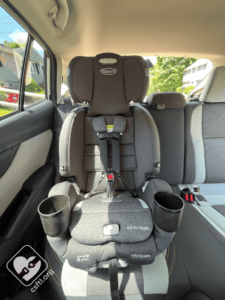
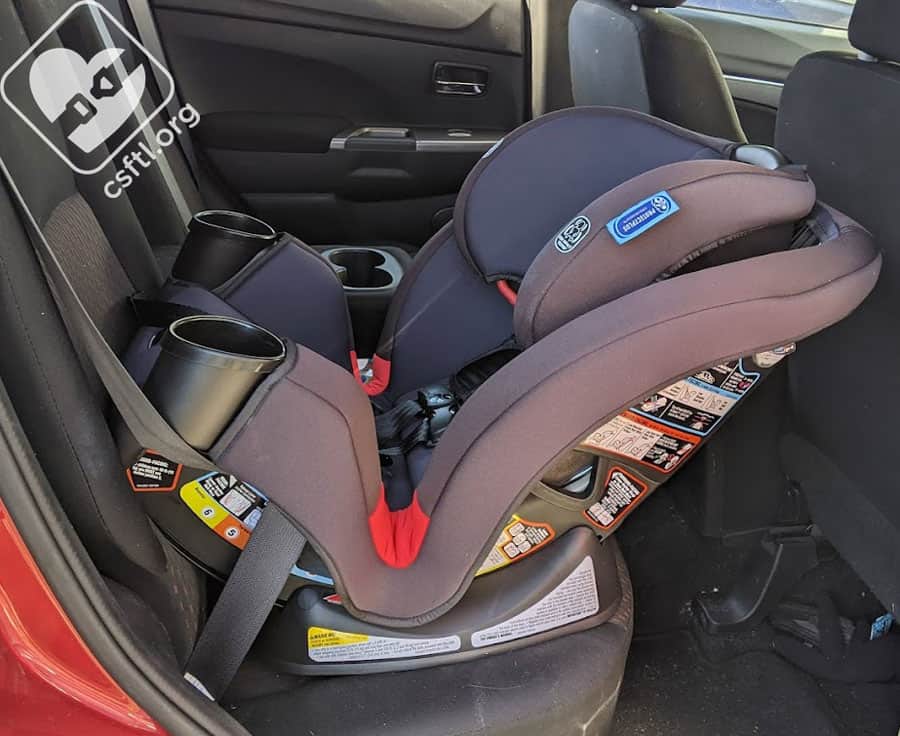
Graco’s product line includes a few multimode seats, each with slightly different features to meet a wide variety of needs. The TriRide joins the ranks of those seats (most of which we are big fans of!), adding a reasonably-priced option that includes standard j-hook lower anchors. This seat rear faces, forward faces, and converts to a high back booster, though not at the same time.
CSFTL Quick Stats
Rear facing harness mode weight range: 5-40 pounds
Rear facing harness mode height range: 49 inches tall, the top of the child’s head must be at least 1 inch below the headrest adjustment lever
Rear facing insert must be used if the harness is above the child’s shoulders in the lowest harness setting
Forward facing harness mode weight range: 22-65 pounds
Forward facing height range: 49 inches tall or less and when the harness straps are at or just above the child’s shoulders and the top of the child’s ears are below the top of the headrest.
Booster mode weight range: 40-100 pounds
Can use LATCH in booster mode
Expiration: 10 years
Crotch buckle position: the slot closest to the child without being underneath them.
Note: cupholders must be installed
Unique Features
2 cupholders
No rethread harness
Steel reinforced frame
6 position recline
Measurements
Width at widest point: 18 inches at the cupholders
Seat pan depth: 12 inches
Highest harness height: 17 inches
Lowest harness height: 8 inches with padding
Crotch buckle positions:
Seat weight: 17 pounds
Assembly Required
Graco TriRide cupholder assembly
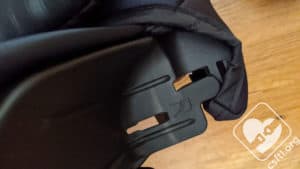
The cup holders must be installed. We’re mentioning this early in our review so caregivers don’t miss this critical step.
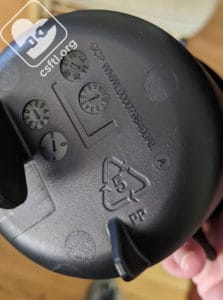
Graco TriRide cupholder assembly
Here’s how: look at the bottom of each cupholder — they’re labelled with “L” or “R” for left or right. Slide the little hook on the cupholder into the slot in the seat, then rotate the bottom of the cup holder down until you hear a click. If you don’t hear that click (and I didn’t the first time I tried this) the cupholder isn’t secure.
Quick Start Guide
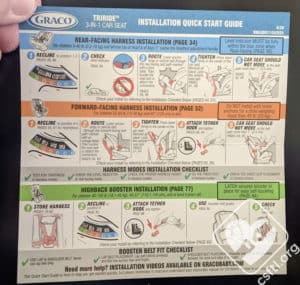
Graco TriRide Quick Start Guide
The TriRide includes a handy Quick Start Guide that’s packed with good intentions but also includes a lot of information in a tiny space. I found this guide helpful, but a bit overwhelming at the same time.
Recline Angle Indicator

Graco TriRide recline angle indicator
The ball style recline angle indicator has two positions: light blue is for infants who are less than 3 months old, the dark blue is for rear facing passengers who are older than 3 months old. As always, I offer a reminder to check this angle on level ground only.
Recline Positions
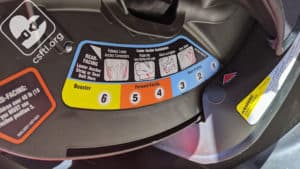
Graco TriRide recline angles
The TriRide has 6 recline positions: 1-3 are for rear facing, 4 and 5 are for forward facing, position 6 is for booster mode.

Graco TriRide
Note: children who weigh over 40 pounds must use recline position 5 in forward facing mode. There are no such restrictions on recline positions in rear facing mode. This limitation is clearly indicated by a label that’s right next to the recline angle position label (though this 40 pound instruction label is tucked under the edge of the shell so it’s not totally obvious).
Recline Adjuster
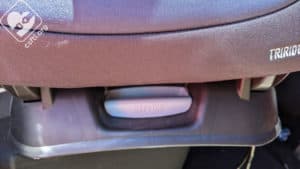
Graco TriRide recline angle adjuster
Unlike some other Graco seats I know well, the TriRide’s angle adjuster is mounted on the base of the seat instead of the shell. I’m sure this particular challenge is sort of unique to me (and other techs who know those other, similar, seats well) but I kept finding myself trying to squeeze a handle on the seat’s shell that wasn’t there. Once I remembered where this adjuster handle was, moving the seat between recline positions wasn’t too difficult.
Installation: Rear Facing
Vehicle Seat Belt
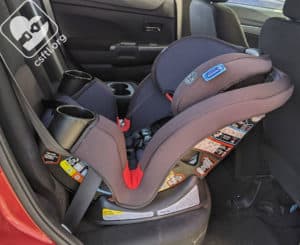
Graco TriRide rear facing vehicle seat belt
Since this seat includes standard lower anchors, my first thought was to use the vehicle seat belt. Since I’m reviewing this seat for science (and for you), I’ll be testing both methods but I wanted to confess that Graco’s standard lower anchors intimidate me a bit not because they look so fierce but because sometimes, they’re hard to remove from the vehicle once the seat is installed via that method. But here we are so I’ll tackle both methods as we go.
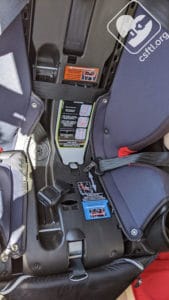
Graco TriRide belt path exposed
Let’s talk about the belt path. The seat has two belt paths, one for rear facing and one for forward facing. These belt paths are fairly easy to access — the entire inside of the cover unsnaps to expose the critical areas!
The first thing I noticed about the rear facing belt path was how much of the surface of my hands got scraped up while I was threading the vehicle seat belt through it. It’s oddly small, which is great if you have oddly small hands but I apparently do not. What worked for me was figuring out the exact correct angle to hold the seat belt buckle, then carefully thread it through the belt path.
Once the belt is threaded through the belt path, set the TriRide on the vehicle seat with the harness facing the back of the vehicle. Thread the vehicle seat belt through the rear facing belt path (it’s blue, indicated with labels on the seat’s shell), then buckle it in. Warning: only pull enough of the seat belt to go through the belt path. If you pull the entire seat belt out from the retractor, you’ll have a lot of webbing to content with and sometimes that’s not pretty, though the long seat belt can be reminiscent of a CVS receipt.
Buckle the seat belt, then pull up on the shoulder belt to remove the slack from the seat belt. Press down on the seat right where the child’s bottom will go to compress the vehicle seat and remove more slack. Once the seat is secure, hold the now-taught belt in place with one hand while pulling the rest of the vehicle seat belt out with the other. Once the seat belt starts to lock, feed the seat belt back into the retractor then check for movement at the belt path when it’s complete.
Check your work by giving the seat a firm handshake at the belt path, it shouldn’t move more than an inch at the belt path.
I realize that at this point, I’ve installed more than a few Graco multimode seats so I had a lot of tricks up my sleeve but even with taking that experience into consideration, installing the TriRide was pretty darn easy.
Lower Anchors
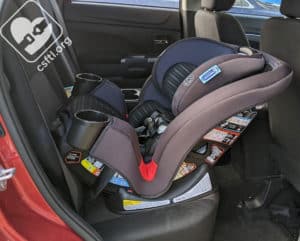
Graco TriRide rear facing lower anchors
The standard lower anchor connectors on some Graco car seats can be really difficult to loosen so I’ll admit once again to being skeptical about these lower anchors. I’m pleased to tell you that I was able to install the seat using these lower anchors AND remove said lower anchor connectors without too much trouble. The trick is to squeeze the grey button on the connectors while pulling the taut portion of the webbing, for me that was enough to loosen the anchor and remove them from the car.
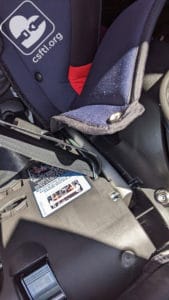
Graco TriRide move lower anchors
So here’s how to install the TriRide with those lower anchors. Make sure the webbing and lower anchor connectors are in the rear facing belt path (the webbing slides along a bar on the inside of the seat), then set the TriRide on the vehicle seat with the harness facing the back of the vehicle. Connect each lower anchor connector to the lower anchors in the vehicle (I always suggest starting with the side that’s the furthest away from you so you don’t have to wrestle with the car seat and the webbing at the same time). Remove the inside corner of the cover to expose the belt path, then pull the tail of the webbing straight up through the hole, toward the middle of the seat pan while pushing down on the car seat to remove the slack from the webbing.
Check your work by giving the seat a firm handshake at the belt path, it shouldn’t move more than an inch at the belt path.
Fit to Child
Rear Facing
Newborn Doll
With Infant Padding

Graco TriRide newborn doll with padding
Our newborn Huggable Images doll doesn’t seem to grow, it still weighs 7 pounds and is 17 inches long. With the harness in the lowest position and the optional infant padding in place, our doll fit reasonably well. This padding MUST be used if the child’s shoulders are below the lowest harness setting.
Without Infant Padding

Graco TriRide newborn doll without padding
Naturally, we tried the fit without the optional padding to see how that would fit since our doll’s shoulders are just above that lowest harness setting. We aim to be a full service organization so here we go. The seat fit our newborn doll well without the padding in place. We’d strongly suggest that any caregivers using this seat with a newborn work with a CPST to determine the best fit for the child.
16 Month Old Doll

Graco TriRide rear facing 16 month old doll
Our 16 month old doll is 32 inches tall and carries very little weight. The seat offered the doll plenty of rear facing room along with room to grow.
3 Year Old Doll

Graco TriRide rear facing 3 year old doll
Our 3 year old doll is 38 inches tall and still weighs barely anything. The doll is getting short on legroom (which does not impact safety since the car seat is designed to protect a child’s head, neck, and spine) but has room to grow yet. We’d expect our doll to fit in this seat rear facing for a little while yet.
Forward Facing
Installation
Vehicle Seat Belt
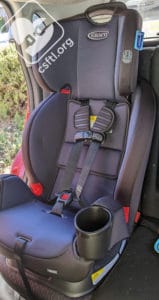
Graco TriRide forward facing
In forward facing mode, the TriRide has some of the same small belt path challenges that it does in rear facing mode. It’s really easy to access the belt path, just unsnap the front of the cover to expose the belt path, then thread the vehicle seat belt through the belt path and buckle it in. The open belt path offers 2 different ways to tighten the seat belt — from inside the front of the seat or outside the shell. I tried both (not at the same time), I found that heading outside the car, then pulling the seat belt toward me while pushing the seat away from me worked quite well. I also stood in front of the seat, pushing the car seat back toward the vehicle seat while pulling the shoulder portion of the seat belt tight. Both methods worked well and I was able to secure the seat without a lot of grunting or cursing.
Check your work by giving the seat a firm handshake at the belt path, it shouldn’t move more than an inch at the belt path.
Lower Anchors
Installing the TriRide forward facing with the lower anchors was a slightly different story — I found that pulling the tail of the webbing straight up through the belt path from inside the seat was the easiest way to secure the seat (for me, in my vehicle. Your mileage may vary!).
Check your work by giving the seat a firm handshake at the belt path, it shouldn’t move more than an inch at the belt path.
3 Year Old Doll
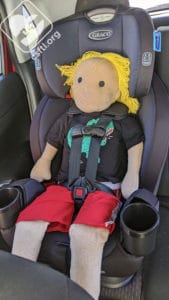
Graco TriRide forward facing 3 year old doll
Our three year old Huggable Images doll is 38 inches tall and weighs almost nothing. We asked our doll to model the seat in forward facing mode, we found that our doll has plenty of room to grow in the seat. Unfortunately, we didn’t get any feedback on the seat’s overall comfort level from this model but we’re guessing (based on the many other Graco multimode car seats that we’ve spent time with) that the doll and thus, children, would find this seat comfortable.
6 Year Old Doll

Graco TriRide forward facing 6 years old
Our 6 year old doll is the newest member of my little doll family. The doll is 48 inches tall with a roughly 17 inch seated shoulder height. That puts our new friend at the top end of the height range for this seat, I’d say this doll has about zero room to grow in this mode.
Converting to Booster Mode
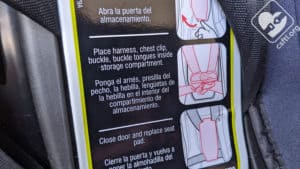
Graco TriRide harness storage
The harness and crotch buckle store in a handy compartment on the seat itself. That’s always a handy thing because it prevents caregivers from losing the harness straps or other parts later.
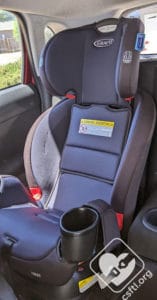
Graco TriRide booster mode
To convert the TriRide to booster mode, first release all slack from the harness until it’s very loose, then raise the headrest all the way. Pull back the inside of the cover to expose the storage door inside the seat’s shell. Remove the crotch buckle from the seat pan (you’ll need to access the underside of the seat to complete this task). Connect the chest clip, then tuck the buckle tongues and crotch buckle inside that handy door and close the door. Ta-da, the seat is now a high back booster seat!
Fit to Child
6 Year Old Doll

Graco TriRide booster mode 6 year old doll
The newest member of my doll family is a 6 year old, 48 inch tall Huggable Images doll. Foster dog Kamo remains VERY interested in my training dolls so I have to sneak the dolls past him on the way to the car. I’m pleased to announce that I was successful in getting past him once again. In booster mode, the doll has an excellent fit with the lap belt across the tops of the thighs and the shoulder belt across the center of the shoulder. We would absolutely expect this kind of booster mode fit, Graco is very consistent in this area and we are pleased to award another virtual gold star for the booster mode fit on the TriRide!
The seat does have some flared edges that might make it more difficult for new booster riders to buckle themselves in and I must mention that our 6 year old doll is at the very top of the height range here. This puts the TriRide in the category I call “transitional boosters” since they aren’t terribly long-lasting but make a nice option to help new booster riders learn how to sit properly in a seat they already know well.
Travel
I travelled with many different car seats over the years — lightweight seats, heavier seats, and everything in between. Though my kiddos are now past the time when they need car seats, I could easily see us using the TriRide as a travel seat. It’s fully-featured enough to be easy to adjust on the go (the harness adjuster is so smooth!), installs without much difficulty, and isn’t terribly heavy. It may be a bit wide on the airplane seat, I doubt it’s a candidate for three across while in flight but next to a caregiver, it would be just fine.
Three Across
The TriRide is many things — a fairly lightweight seat for all that it does but it’s not what I’d consider a solid option for three across situations. It’s about 18 inches wide at the cupholders.
Important Information: Where to Find
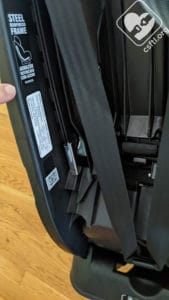
Graco TriRide date of manufacture label
Date of manufacture label: this label is on a pillar on the back of the seat
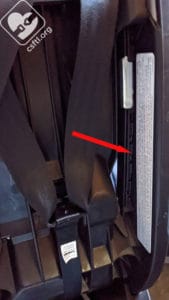
Graco TriRide FAA approval label
FAA approval label: this label is on the outside of the base. The TriRide can be installed on aircraft in harness mode.
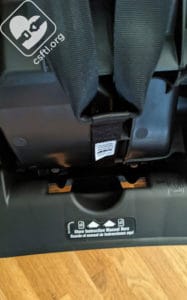
Graco TriRide manual storage
Manual storage: the manual stores on the back of the base
Overall Thoughts
All in all, the TriRide has a lot going for it. It fit all of our dolls well, installed without too much trouble, converts between modes with ease and comes in at a pretty reasonable price point.
BIG GIVEAWAY!
Our friends at Graco are giving away FIVE TriRides in the Clybourne fashion. Please read our Terms and Conditions, then enter below for your chance to win!
a Rafflecopter giveaway
